Japanese Sesame Chicken: The Best Homemade Asian Dinner Recipe
This Japanese Sesame Chicken is crispy, saucy, and packed with bold umami flavor. Better than takeout and ready in under 45 minutes, it is the ultimate homemade Asian dinner recipe.

The Japanese Sesame Chicken Recipe That Will Replace Your Takeout Order
If you have ever stood in your kitchen craving that glossy, sticky, golden sesame chicken from your favorite Asian restaurant, this recipe is exactly what you have been looking for. This Japanese Sesame Chicken delivers everything you love about the classic dish: crispy bite-sized chicken, a rich and savory honey sesame glaze, and that deeply satisfying umami depth that keeps you going back for just one more piece.
The best part? It comes together in about 45 minutes using pantry staples you likely already have on hand. No deep fryer. No mystery ingredients. Just a straightforward, rewarding homemade sesame chicken dish that rivals anything from a Chinese buffet or takeout spot.
Why This Homemade Sesame Chicken Works So Well
This recipe draws inspiration from Japanese-style karaage technique (the double-coat in egg and cornstarch) and pairs it with a honey sesame sauce rooted in classic Chinese food easy recipes tradition. The result is something that feels familiar but tastes noticeably fresher and more vibrant than anything reheated under a buffet lamp.
A few things make this recipe stand out:
- Chicken thighs over breasts. Thighs stay juicy even after a hard sear, making them perfect for stir-fry dishes.
- Cornstarch dredge, not flour. Cornstarch creates a lighter, crispier shell that holds up beautifully once the sauce is added.
- Toasted sesame oil added at the sauce stage. This preserves its nutty, aromatic punch instead of burning it off in a hot pan.
- A proper sauce reduction. The cornstarch slurry transforms the sauce from thin and soupy into that clingy, lacquered glaze you see in the best easy Chinese food recipes chicken dishes.
Having the right tools in your kitchen makes a real difference when you are cooking a stir-fry at high heat. A quality wok or heavy skillet ensures even heat distribution, and a reliable microplane makes grating fresh ginger effortless rather than frustrating.
The Sauce: Where the Magic Happens
The sesame sauce is the soul of this dish, and it is worth talking about before you dive in. It is built on four core flavor pillars:
- Soy sauce for savory depth and color
- Honey for natural sweetness and that sticky glaze
- Rice vinegar for brightness that keeps the sauce from feeling heavy
- Toasted sesame oil for that unmistakable nutty aroma
Fresh garlic and grated ginger are non-negotiable here. They are what separate a truly great homemade sesame chicken dish from something that tastes like a bottled sauce poured over bland protein.
Chef's Tip: Always use toasted sesame oil, not plain sesame oil. The toasted version has a deep, rich flavor that is essential to this dish. A little goes a long way, which is exactly why it is added to the sauce rather than used as a cooking oil.
Getting the Chicken Perfectly Crispy
This is the step most home cooks rush, and it is the one that matters most. Follow these three rules and you will get that restaurant-quality crunch every time:
Dry the chicken completely. Moisture is the enemy of crispiness. Pat every piece dry before seasoning and coating.
Do not crowd the pan. Cook in two batches. Crowding drops the oil temperature and causes the chicken to steam instead of sear.
Rest on a wire rack, not a plate. A flat plate traps steam underneath the chicken and makes the bottom soggy. A wire rack lets air circulate all the way around.
Warning: If your oil is not hot enough when the chicken goes in, the cornstarch coating will absorb the oil rather than fry in it. You want the oil shimmering and just starting to ripple before you add the first batch.
Serving Ideas for the Best Asian Dinner
Steamed jasmine rice is the classic base and the one most people reach for first. But this sesame chicken is also incredible over:
- Lo mein noodles for a more filling noodle bowl
- Cauliflower rice for a lighter, lower-carb option
- Steamed broccoli and snap peas to turn it into a full sesame chicken stir-fry dish
- Lettuce wraps for a fun party appetizer
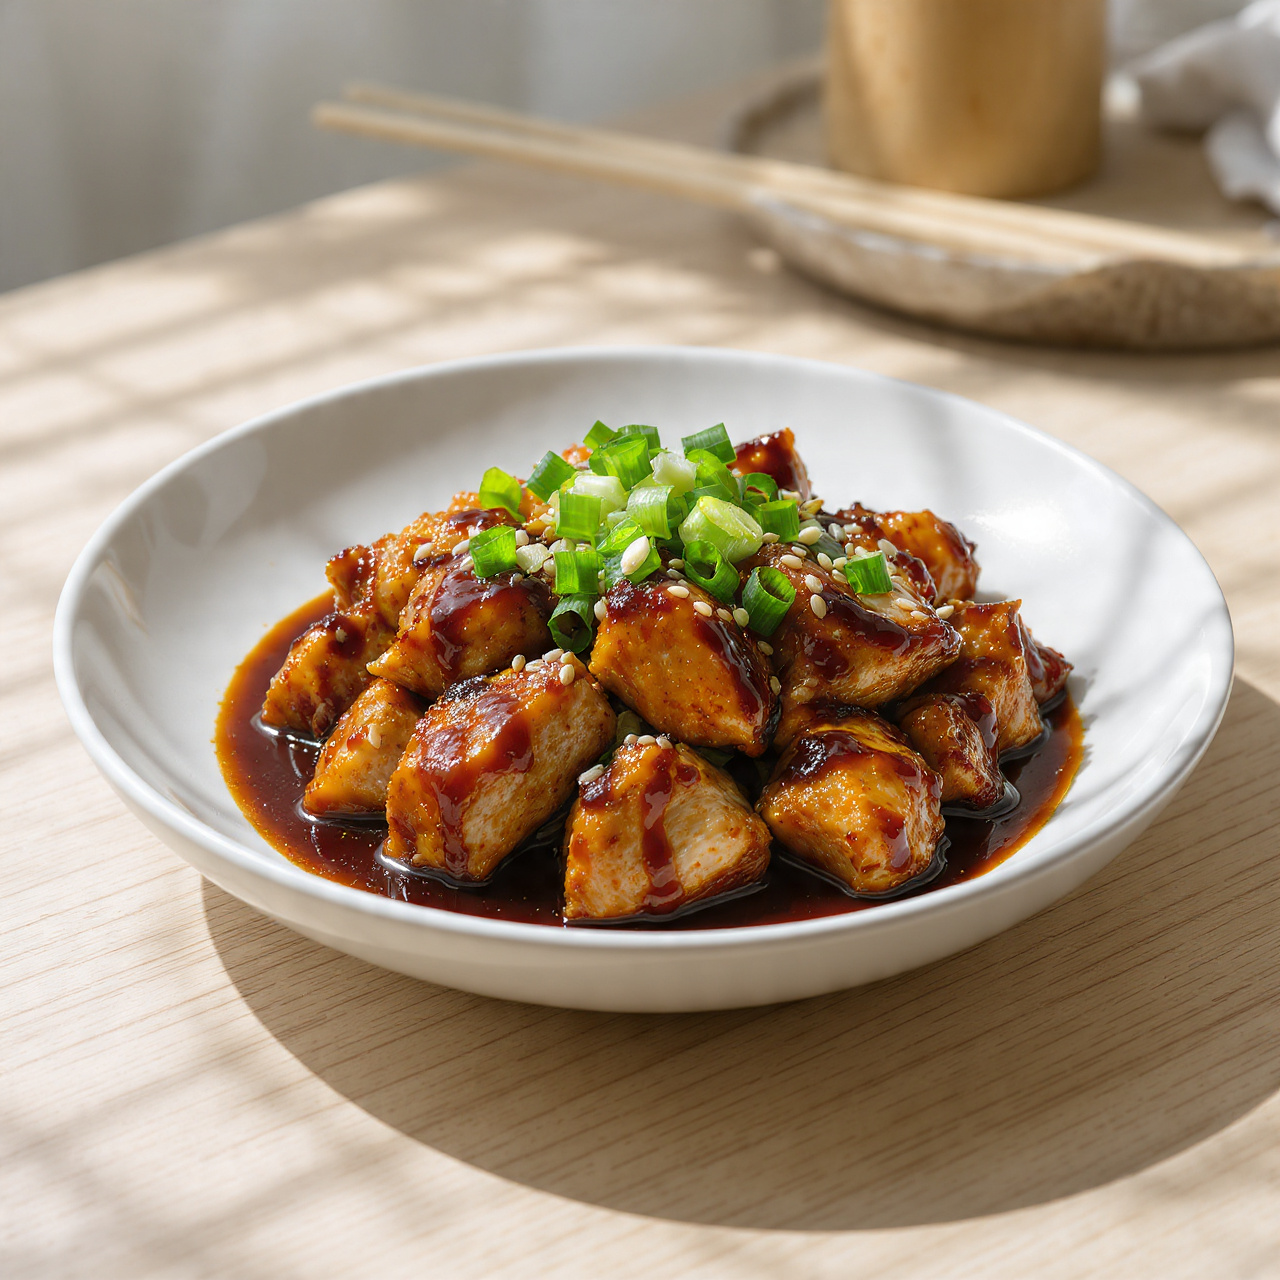
A sprinkle of extra toasted sesame seeds and a handful of sliced green onions are all the garnish you need. They add a little freshness and visual pop that makes the whole plate look like it came from a restaurant.
Ready to make it? Here is the full step-by-step recipe:
Japanese Sesame Chicken: The Best Homemade Asian Dinner Recipe
This Japanese Sesame Chicken is crispy, saucy, and packed with bold umami flavor. Better than takeout and ready in under 45 minutes, it is the ultimate homemade Asian dinner recipe.
Ingredients
- 1 1/2 lb boneless skinless chicken thighs, cut into 1.5-inch pieces
- 1/2 cup cornstarch, for dredging
- 2 large eggs, beaten
- 3 tbsp vegetable oil, for frying
- 3 tbsp soy sauce, low sodium preferred
- 3 tbsp honey, pure honey, not artificial
- 2 tbsp rice vinegar
- 1 tbsp sesame oil, toasted sesame oil for best flavor
- 4 garlic, cloves, minced
- 1 tsp fresh ginger, grated
- 1/4 cup chicken broth
- 1 tbsp cornstarch, mixed with 2 tbsp cold water to make a slurry
- 2 tbsp toasted sesame seeds, for garnish
- 3 green onions, thinly sliced, for garnish
- 2 cups steamed white rice, cooked, for serving
Instruction
Pat the chicken pieces completely dry with paper towels. This is the most important step for achieving a crispy exterior. Season lightly with salt and white pepper.
Set up your dredging station: place the beaten eggs in one shallow bowl and the cornstarch in another. Dip each piece of chicken into the egg, let the excess drip off, then press firmly into the cornstarch until fully coated.
In a large skillet or wok, heat the vegetable oil over medium-high heat until shimmering. Working in two batches to avoid crowding, add the coated chicken in a single layer. Cook for 4 to 5 minutes per side until deep golden brown and cooked through. Transfer to a wire rack or paper towel-lined plate.
Pour off any excess oil from the pan, leaving about 1 teaspoon behind. Add the minced garlic and grated ginger and stir-fry for 30 seconds until fragrant.
Pour in the soy sauce, honey, rice vinegar, sesame oil, and chicken broth. Stir to combine and bring the sauce to a gentle simmer over medium heat.
Add the cornstarch slurry to the simmering sauce. Stir constantly for 1 to 2 minutes until the sauce thickens to a glossy, coating consistency. Taste and adjust seasoning if needed.
Add all of the crispy chicken back into the pan and toss well to coat every piece in the sesame sauce. Cook for 1 more minute so the sauce clings and caramelizes slightly.
Serve immediately over steamed white rice. Garnish generously with toasted sesame seeds and sliced green onions.
Equipment
- Large skillet or wok
- Two shallow bowls for dredging
- Wire rack or paper towel-lined plate
- Microplane or fine grater (for ginger)
- Tongs
- Small whisk
- Measuring cups and spoons
Notes
Storing and Reheating Your Sesame Chicken
Leftovers keep well in an airtight container in the refrigerator for up to 3 days. When you are ready to eat, reheat in a skillet over medium heat with a small splash of water or chicken broth to loosen the sauce back up.
If you want to meal prep this recipe, cook and refrigerate the crispy chicken and the sauce separately. Combine them only when you are ready to eat. This keeps the texture noticeably better than storing them already mixed together.
Make It Your Own
Once you are comfortable with the base recipe, there are plenty of ways to riff on it:
- Add red pepper flakes or sriracha to the sauce for heat
- Stir in sliced bell peppers or broccoli to the pan right after cooking the garlic
- Swap the honey for maple syrup for a slightly earthier sweetness
- Use coconut aminos instead of soy sauce for a soy-free, lower-sodium version
This is one of those recipes that rewards repetition. The first time you make it, you will be impressed. The second time, you will have it memorized.